
How sprinkler systems accelerate paver joint sand loss
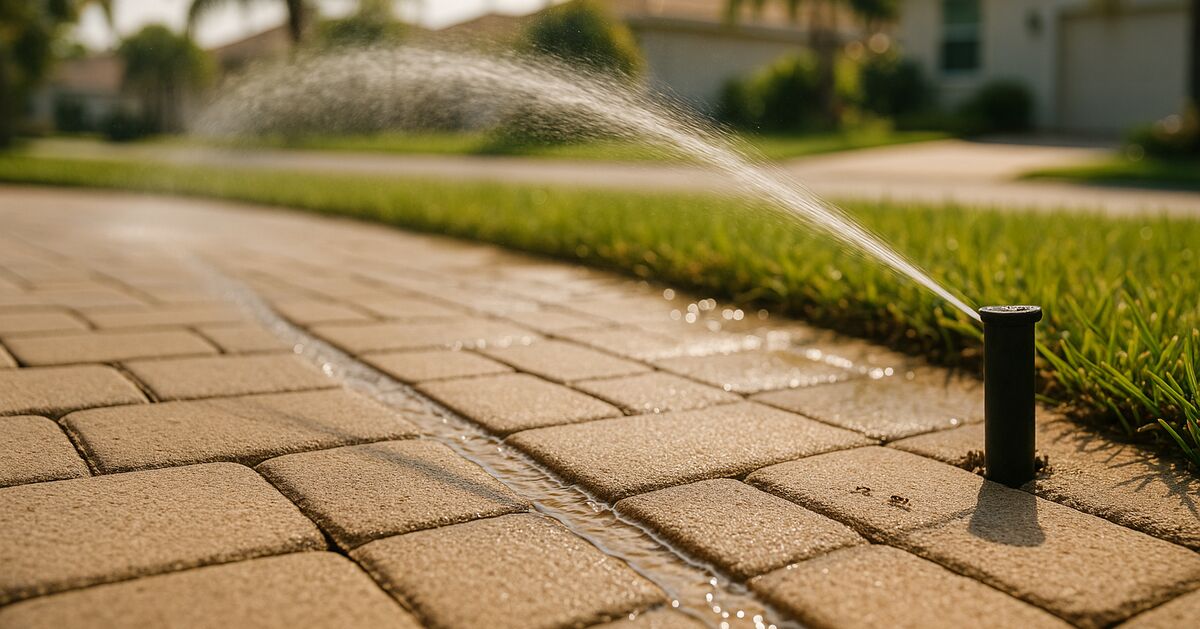
Irrigation water is quietly one of the most destructive forces acting on paver driveways and walkways across Lakewood Ranch, Wellen Park, Sarasota, and Bradenton. The sprinkler heads pop up, do their job for fifteen minutes, and retract. Meanwhile, the joint sand between your pavers is being eroded, flushed, and compacted a little more every single day.
If you've noticed ants building mounds between your pavers, paver edges that rock underfoot, or a surface that looks fine from ten feet away but is riddled with shallow channels between the stones, your irrigation schedule is probably part of the story. And if a contractor tells you that resealing will fix it, that's worth questioning before you spend money.
What joint sand actually does (and why it matters more than people think)
The sand packed between paver joints is not filler. It is a structural component of the surface. Those narrow gaps are where the entire interlocking system transfers load from one paver to the next. When the sand is full and well-compacted, each paver is essentially braced on four sides by its neighbors. The load from a vehicle tire, a rolling trash bin, or foot traffic spreads outward through the field of pavers rather than concentrating on any single stone.
When joint sand is depleted, the pavers lose that lateral support. They begin to wobble individually. Over time, small vertical shifts accumulate into visible trip hazards and surface unevenness. In areas with Florida's sandy subgrade, a paver that rocks under load will eventually push the base material outward, making settlement worse with every cycle.
The joint sand also controls weed germination. A fully packed joint leaves almost no space for weed seeds to establish roots. A half-empty joint is basically a prepared seedbed with good drainage.
How sprinklers flush the sand out, zone by zone
Here's the physical sequence that plays out under every irrigation cycle.
Water hits the paver surface and runs toward the joints because the paver face is slightly convex (a normal manufacturing characteristic). The water enters the joint and accelerates downward. Fine sand particles are suspended in the moving water and carried with it. Some particles exit laterally through the edge restraints. Others migrate downward into the bedding layer, which slowly contaminates the compacted sand base with fine material, reducing drainage and creating soft spots.
A single irrigation cycle removes only a small amount of sand. But a twice-daily irrigation schedule across a hot Florida summer compounds to hundreds of cycles per season. By the end of the first year, a brand-new paver installation can show meaningful joint depletion, especially in the zones where sprinkler heads throw water directly onto a hard surface rather than into turf.
This is a recognized pattern in the paver installation industry. ICPI technical resources discuss water infiltration as a contributing factor in joint sand loss in permeable and conventional paver systems.
Homes in communities like Wellen Park and Lakewood Ranch often have aggressive irrigation schedules set by the builder or the CDD and are not adjusted after sod establishment. Grass that was set during construction may need daily watering, but a mature lawn needs far less, and the irrigation timer rarely gets reset. If you've lived in your home for two or three years and still have the builder's irrigation schedule, that's worth revisiting.
The zones on your property that suffer the most
Not all paver areas lose sand at the same rate. The worst-affected spots share a few traits.
Zones where heads throw directly onto hard surfaces. A rotor or fixed spray head aimed at a paver driveway edge, a walkway, or a pool deck surround is concentrating far more water per square foot than the same head aimed at turf. The turf absorbs the water; the paver surface sheds it straight into the joints.
Low points in the paver field. Water follows grade. If there's any subtle depression in the surface, water pools there briefly before draining, and joint sand in that low spot erodes faster than anywhere else.
Edges and perimeters. Sand exits the paver field most easily where there's a gap at the edge restraint, a transition to a concrete curb, or a junction with a planting bed. Even a well-installed edge loses sand faster than the field center because there are more exit paths.
Driveways with curb cuts. In Bradenton and Sarasota neighborhoods with swale-and-curb street drainage, irrigation water that crosses the driveway has a clear runoff path. Sand exits with it continuously.
Why resealing alone will not fix sand depletion
This is the point that surprises a lot of homeowners, and it's worth being direct about it.
Paver sealer is applied to the surface of the stone and to the top inch or so of the joint. A good penetrating sealer binds the top layer of joint sand together, making it more resistant to surface water movement. That's a real benefit. But it does not restore sand that has already left the joint, and it does not replace the structural support that missing sand provided.
If you seal pavers with significantly depleted joints, here's what you get: a surface that looks better temporarily, with joints that are now sealed at the top over a cavity below. The pavers still rock. Rainfall and irrigation still reach the sand below the sealed crust through micro-gaps and through the permeable paver body itself. The sand below continues to erode, and the sealed top layer eventually cracks or separates.
You can read more about the specific failure modes that result from sealing without proper preparation in our post on sealing over old sealer without stripping: the exact failure modes. While that post focuses on sealer-over-sealer problems, many of the same mechanical issues apply when sealing is done over structurally depleted joints.
The correct sequence is: assess the joint depth, re-sand to proper fill depth, compact, allow any polymeric sand to cure, and then seal. Skipping the re-sanding step to save money or time produces a result that fails earlier and costs more to correct later. Our post on re-sanding versus polymeric sand for Gulf Coast pavers goes deep on choosing the right sand type before the sealer goes down.
Conventional sand versus polymeric sand: which holds up to irrigation?
This is where the choice of joint sand becomes critical for any property with active irrigation.
Conventional silica sand, which is what most paver installations use, has no binder. It packs well under compaction, but it is always susceptible to hydraulic displacement. A sprinkler head aimed poorly at the paver field will remove conventional sand indefinitely.
Polymeric sand contains fine aggregate and a polymer binder that activates with water and then sets firm when it dries. When installed correctly, a polymeric sand joint resists surface water erosion far better than plain sand. It also suppresses weeds more effectively and is less hospitable to ants.
The trade-off is installation requirements. Polymeric sand must be installed in the right temperature range, activated with precise amounts of water, and protected from rain during the curing window. In the summer heat of Venice, Nokomis, or Palmer Ranch, a hot afternoon followed by a pop-up thunderstorm can ruin a polymeric sand installation if the timing is wrong. This is one reason why professional installation matters more with polymeric sand than with conventional sand.
Polymeric sand is also not a permanent barrier to erosion. In high-flow situations, it can crack or erode at the joints over time. But for typical residential driveways and walkways with normal irrigation patterns, it significantly extends the interval between re-sanding cycles. Our paver sealing and restoration services always include an assessment of whether polymeric or conventional sand is the right choice for a given property's drainage patterns and irrigation setup.
What to do about your sprinkler system before you reseal
Resealing is most cost-effective when the surface is stable and the sand is at the right depth. That means addressing irrigation before or alongside restoration, not after.
A few practical steps worth taking before calling for a reseal quote:
- Walk the system zone by zone in daylight, with it running. Note any head that throws water directly onto a paver surface. These should be adjusted to reduce direct impingement. A licensed irrigation technician can reposition heads or swap fixed sprays for drip emitters in beds adjacent to pavers.
- Check your run times against your landscape's actual needs. The University of Florida IFAS Extension publishes evapotranspiration-based irrigation scheduling guidance for Southwest Florida. In many cases, mature lawns in the Sarasota and Manatee County area need significantly less irrigation than builder-set timers provide, especially in the rainy season.
- Look at where water exits the paver field. If runoff consistently cuts through a specific joint area, that's a drainage design issue. Re-sanding helps, but redirecting the water is the more durable solution.
- Consider adjusting your irrigation schedule seasonally. Florida's Water Management Districts, including SWFWMD, provide guidance and may set irrigation day restrictions, so check local rules for seasonal adjustment requirements. The Southwest Florida Water Management District (SWFWMD) provides guidance on irrigation best practices for residents in our service area.
What a proper assessment looks like before any restoration work
Before any re-sanding or resealing job, an experienced contractor should probe joint depth in multiple locations across the paver field. A simple method is to insert a thin metal probe or a straightened wire into the joint and note the depth of the void above the bedding layer. Manufacturer guidance from ICPI specifies joint filling depth relative to the chamfer (the beveled edge) of the paver. Joints should be filled to within about 1/8 inch of the paver surface, just below the chamfer line.
If the joints are at half-depth or less, re-sanding is not optional. It's structural.
The condition of the bedding layer is also worth assessing where wobbling pavers suggest base contamination. In severe cases, particularly in low areas near driveways in Parrish or on pool decks in Venice, lifting a section of pavers to inspect and replace the contaminated bedding material is the right call before any surface treatment happens.
For a broader look at how location and environment affect paver degradation rates across our service area, the post on Parrish pavers vs. Sarasota pavers and how distance from the coast affects degradation covers soil type and moisture differences that also factor into joint sand stability.
The long-term answer: irrigation management plus proper restoration sequencing
Sand loss from irrigation is a chronic, ongoing process. The goal is not to stop it entirely but to slow the cycle and restore the surface correctly at each maintenance interval.
For most residential driveways and walkways in Lakewood Ranch, Wellen Park, Venice, and Nokomis, that means:
- Adjusting irrigation to minimize direct spray on paver surfaces
- Re-sanding with polymeric sand every few years, or sooner if joint depth drops noticeably
- Sealing only after sand is properly restored to the correct depth
- Choosing a sealer that penetrates and binds the top of the joint, not just a film-former that sits on the surface
If your pavers are in a newer community and you're seeing early wear, the post on why Wellen Park pavers are showing wear already covers how builder sand and sealer choices at installation affect how quickly this process starts.
Our team works across all of our service areas, from Parrish in the north to Venice and Nokomis in the south, and we're familiar with the irrigation setups, soil conditions, and community HOA specs that affect paver longevity in each area. If you're not sure whether your pavers need re-sanding, resealing, or both, the best first step is an honest on-site assessment. You can reach us through our contact page to schedule a look before deciding on any scope of work.
The sprinkler system is not the enemy. It's a tool that, when aimed and timed well, can coexist with a healthy paver surface for years. Understanding what it's doing to your joints is the first step toward making sure your next restoration actually lasts.
Sources & further reading
- Interlocking Concrete Pavement Institute (ICPI) - Segmental Paving Technical Resources (Interlocking Concrete Pavement Institute)
- University of Florida IFAS Extension - Irrigation Scheduling for Florida Landscapes (University of Florida IFAS Extension)
- Southwest Florida Water Management District - Irrigation and Water Conservation (Southwest Florida Water Management District)
- Florida Department of Environmental Protection - Landscape Irrigation Best Management Practices (Florida Department of Environmental Protection)
- UF/IFAS Extension (named in this article) (UF/IFAS Extension)
Claim-by-claim audit (6 checked)
- “ICPI technical resources discuss water infiltration as a contributing factor in joint sand loss in permeable and conventional paver systems.” (rewritten to what the article can stand behind)
- “Manufacturer guidance from ICPI specifies joint filling depth relative to the chamfer (the beveled edge) of the paver.” (cited → icpi.org)
- “The University of Florida IFAS Extension publishes evapotranspiration-based irrigation scheduling guidance for Southwest Florida.” (cited → edis.ifas.ufl.edu)
- “Florida's Water Management Districts, including SWFWMD, provide guidance and may set irrigation day restrictions, so check local rules for seasonal adjustment requirements.” (rewritten to what the article can stand behind)
- “The Southwest Florida Water Management District (SWFWMD) provides guidance on irrigation best practices for residents in our service area.” (cited → swfwmd.state.fl.us)
- “By the end of the first year, a brand-new paver installation can show meaningful joint depletion, especially in the zones where sprinkler heads throw water directly onto a hard sur…” (reasoning shown in the article)
Get started
Request a free quote
Tell us what you need. No pressure, and a real person gets right back to you.