
Re-sanding vs. polymeric sand: which does your Gulf Coast pavers need before sealing?
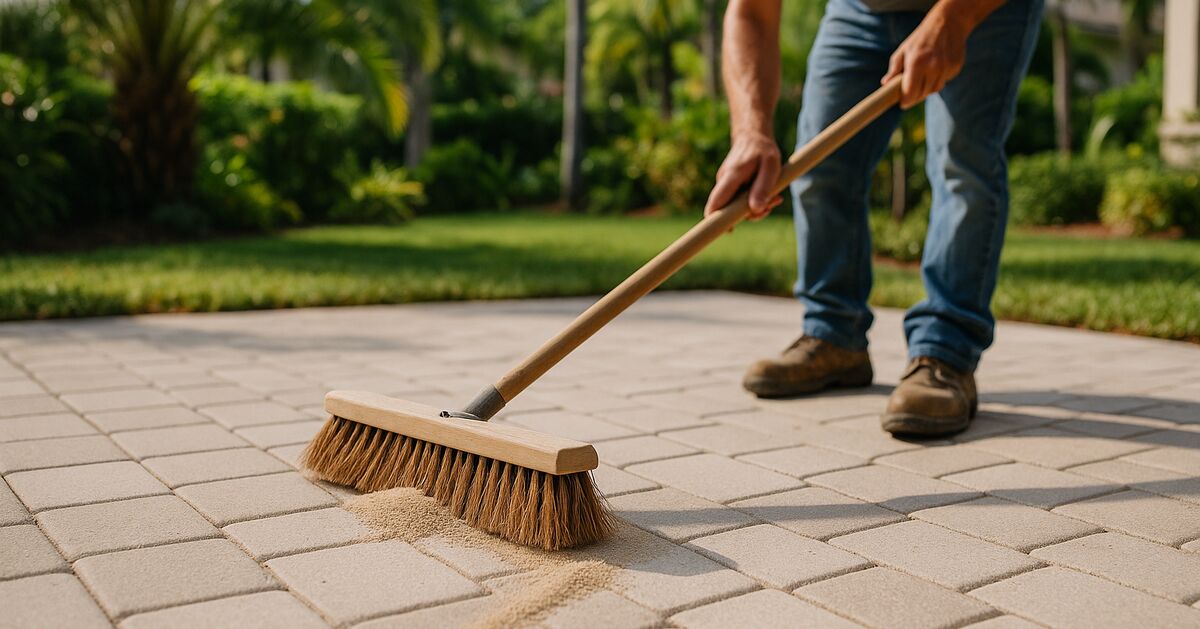
Hollow joints kill a sealing job before the sealer even touches the surface. If the sand between your pavers is depleted, washed out, or crumbling, no amount of quality sealer will save you from wobbling stones, weed regrowth, and ant colonies that treat your patio like a subdivision. So before anything else gets applied, the joints need attention. The question most homeowners in Lakewood Ranch, Venice, and Sarasota eventually ask is: should I just top up with regular sand, or is it worth paying more for polymeric sand?
The honest answer depends on where your pavers are, how badly the joints are depleted, what caused the loss in the first place, and how the pavers will be sealed. This guide walks through all of it.
Why joint sand matters so much before sealing
Paver joints are not decorative filler. They carry real structural work. The sand between individual pavers locks each stone laterally so the field behaves as a connected surface rather than a pile of loose tiles. When joints are full and stable, foot traffic and vehicle weight distribute across the whole system. When joints are hollow or thin, individual pavers rock, edges chip, and the bedding layer underneath gets exposed to water infiltration.
Sealing on top of depleted joints makes things worse, not better. The sealer bridges over the hollow gaps and creates a thin film across empty space. That film cracks within a season, water gets in underneath, and the sealer starts to peel and flake. Anyone who has seen a paver driveway in Bradenton or Parrish with peeling, bubbling sealer has probably seen this exact scenario.
If you want to understand more about why sand keeps disappearing from Gulf Coast joints in the first place, our earlier post on how joint sand keeps washing out of your pavers in Florida and why sealing is the permanent fix covers that thoroughly.
What regular re-sanding actually is
Regular re-sanding uses dry, fine-grained sand, typically a kiln-dried silica sand or a washed concrete sand, swept into the joints and compacted. It is the same material used when pavers are first installed. The process is straightforward: spread the sand across the surface, work it into joints with a push broom, compact with a plate compactor, sweep again, and repeat until joints are full.
The advantages are real. Regular sand is inexpensive, widely available, and easy to work with. If a joint gets overfilled, you brush the excess away. If something shifts and needs to be releveled, the sand comes back out without drama. For interior patios or covered lanais that are sheltered from direct rain, regular sand does its job quietly and without complaint.
The disadvantage is equally real on the Gulf Coast. Regular sand has no binder. It is held in the joint by friction and by the sealer film that gets applied over it. In Florida, where summer thunderstorms can drop two inches of rain in forty minutes, unbound sand migrates. It washes toward the low end of the surface, collects at drains, and leaves joints at the high end thinning out again within a year or two. Ants and weeds exploit any gap that appears.
What polymeric sand actually is
Polymeric sand looks similar to regular joint sand but contains polymer binders mixed into the granules. When you wet the filled joints, those polymers activate and bond the sand particles together into a semi-rigid mass. When it cures fully (usually 24 to 48 hours in Gulf Coast heat and sun), the joint holds its shape much better under rain and irrigation.
Quality polymeric sands also contain herbicide and insecticide components that discourage weed germination and ant tunneling in the joint, though those additives do diminish over time.
The tradeoff is that polymeric sand costs more, requires more careful installation, and is less forgiving of mistakes. If you wet it too early, too aggressively, or fail to remove haze from the paver surface before the polymers set, you end up with a cloudy film on the paver face that is genuinely difficult to remove without aggressive stripping. If you seal over joints that have not fully cured, you can trap moisture and cause the sealer to fail.
The Gulf Coast case for polymeric sand in exposed locations
For driveways, pool decks, open patios, and any surface that takes direct rainfall without overhead shelter, polymeric sand almost always makes more long-term sense on the Gulf Coast. Here is why the local environment tips the balance.
Southwest Florida's rainy season is intense. Between June and September, Sarasota, Venice, Nokomis, and Wellen Park all see repeated high-volume storms that hit quickly and drain off hard surfaces fast. That rushing water sheet-flows across paver surfaces and pulls fine sand out of joints with surprising efficiency. A joint that was full in April can be visibly thin by August, even on a well-installed surface.
The salt air environment also plays a role. Coastal properties in Venice and Nokomis, or homes close to the bay in Bradenton and Sarasota, see airborne salt settle on surfaces. Salt is hygroscopic, meaning it attracts and holds moisture, and that moisture accelerates the erosion of loose particulate material including joint sand. Polymeric sand's bound matrix resists this better.
Finally, Florida's high water table and active irrigation systems keep the ground underneath pavers consistently moist, which means ant colonies find the environment extremely hospitable. Carpenter ants and fire ants tunnel into loose joint sand constantly. Polymeric sand's firmer, often treated joint is a meaningful deterrent.
When regular sand is still the right call
That said, polymeric sand is not automatically the right answer everywhere. Consider situations where regular sand makes more sense.
Covered or screened lanais. If a lanai or outdoor living space is fully under a screen enclosure or solid roof, rain exposure is minimal. Regular sand will hold just fine, and you save the extra cost of polymeric product.
Repairs and spot fills. If only a few joints in an otherwise healthy surface need topping up before sealing, using polymeric sand in isolated spots can cause color inconsistency. A small bag of kiln-dried sand brushed into the low spots often makes more sense.
Pavers over compacted gravel with excellent drainage. On a perfectly graded surface that sheds water cleanly and has no ant pressure, regular sand performs well for years. The drainage conditions on some inland Lakewood Ranch or Parrish installations can be good enough that standard sand lasts a full sealer cycle without significant loss.
Budget constraints on a full property. Sometimes the right call is to do regular sand, seal properly, and plan to address polymeric at the next reseal cycle once you know how the surface performs. An honest contractor will tell you this rather than upselling polymeric on every job.
How sealing interacts with your sand choice
This is the part that surprises a lot of homeowners. The sealer you choose and the sand you use need to work together, not just coexist.
When you apply a solvent-based sealer over polymeric sand, the solvent can actually soften and partially dissolve the polymer binders in the joint if the sand has not fully cured. This causes the joint surface to track onto boots and furniture, and it compromises the sealer's bond at the joint edges. Good practice is to allow polymeric sand to cure for at least 48 hours in dry conditions (longer during the rainy season or in humid, cloudy weather) before sealing goes down.
Water-based sealers are gentler in this interaction and are often preferred over polymeric joints for exactly that reason. If you are curious about the broader differences between wet-look and natural-finish sealers, our guide on wet-look vs. natural paver sealer covers what each does to the surface appearance and why the choice matters beyond just aesthetics.
Regular sand joints need to be dry and stable before sealing too, but the timing requirements are less strict. Compact, sweep, let the surface dry, and seal.
Mistakes to avoid during re-sanding
Whether you choose regular sand or polymeric, a few errors consistently lead to poor outcomes.
- Overfilling joints. Sand should sit slightly below the chamfered paver edge, not flush with or above the paver top. Overfilled joints push up into the sealer and create a rough, uneven bond line.
- Sealing before joints are fully settled. Compaction is essential. Joints that feel full but have not been compacted with a plate compactor will settle under foot traffic after sealing and create visible depressions in the sealer film.
- Skipping the haze removal step with polymeric sand. Fine polymer particles settle on the paver surface during installation. These must be swept and blown off thoroughly before wetting the joints. If they are not removed, wetting activates them on the paver face, not just in the joints, and the resulting haze is stubborn.
- Re-sanding without first cleaning. You cannot push new sand into joints that are full of debris, algae, and organic matter. The surface needs to be cleaned first. Our post on whether your pavers need resealing or just a deep clean first is worth reading before you commit to any restoration sequence.
- Using beach sand or construction sand from a random source. These contain clay particles and organic material that introduce weeds and do not compact cleanly. Always use a sand specified for paver joints.
How a professional approaches the decision
When our team assesses a surface before restoration, we look at several things together rather than defaulting to one product on every job.
We check joint depth and uniformity across the whole surface. Joints that are fairly even in their depletion tell a different story than joints that are thin on one side and full on the other, which suggests drainage problems or ant activity concentrated in one area.
We look at what is living in the joints. Heavy weed growth with established root systems means the joint has been open long enough that a thorough cleaning is going to precede any re-sanding. Ant mounds inside the joint tell us the subbase is probably disturbed and we may need to inspect individual pavers for wobble before filling.
We check the existing sealer condition. If the sealer is peeling or crazing, it likely means either the joints failed first or moisture got trapped. Either way, the restoration sequence matters, and our full paver sealing and restoration services page explains how we approach that sequence from start to finish.
We also consider the homeowner's maintenance expectations. Someone in Wellen Park who wants to set it and forget it for three to four years is a better candidate for polymeric sand and a quality solvent-based sealer. Someone doing a budget restoration on a rental property in Bradenton may prioritize cost over longevity and regular sand is appropriate.
What to ask a contractor before they start
If you are hiring out this work rather than doing it yourself, a few questions will tell you quickly whether the contractor is thinking carefully about your specific surface.
Ask what type of sand they plan to use and why. A contractor who defaults to the same product on every job without explaining the reasoning is not thinking about your specific conditions.
Ask about the curing time they plan to allow between re-sanding and sealing. If the answer is "same day," push back, especially if they are using polymeric sand.
Ask whether they will use a plate compactor for compaction or just hand-sweep. For a large area like a driveway or pool deck, plate compaction is essential for joint stability.
Ask what they will do if they find individual pavers that are rocking or sunken. A surface that needs re-leveling in spots requires lifting and releveling those pavers before re-sanding, not just filling over the problem.
Homeowners across our Gulf Coast service areas, from Palmer Ranch to Parrish, often call us after a previous contractor sealed without addressing the joints first. The result is always the same: peeling sealer and disappointment inside of a year.
Putting it together
For most exposed paver surfaces on the Gulf Coast, polymeric sand is worth the added investment before sealing. The region's rainfall volume, humidity, salt air, and year-round ant activity create conditions that defeat regular sand faster than most homeowners expect. That said, regular sand still has its place on sheltered surfaces, smaller repairs, and budget-driven projects where a shorter service cycle is acceptable.
The most important thing is not which sand you choose. It is that you address the joints honestly before sealing, rather than using sealer to hide a problem that will only get worse underneath it.
If you are not sure what your pavers actually need, reach out and we will take a look. We serve homeowners across Lakewood Ranch, Wellen Park, Sarasota, Bradenton, Venice, Nokomis, Palmer Ranch, and Parrish, and a quick site visit is always the best way to give you a straight answer about the right approach for your specific surface.
Get started
Request a free quote
Tell us what you need. No pressure, and a real person gets right back to you.