
Do your pavers need resealing or just a deep clean first?
Your pavers look rough, and you're not sure whether to call for a cleaning, a reseal, or both. That question is worth pausing on, because treating the wrong problem wastes real money and can actually make things worse.
The good news is that a handful of simple observations and one quick water test can point you in the right direction before you spend a dime. Let's walk through the whole process together.
Why the distinction matters so much in Southwest Florida
Florida's climate is harder on exterior pavers than almost anywhere else in the country. The combination of intense UV radiation, heavy summer rain, high humidity, and sandy soil creates conditions where both dirt buildup and sealer breakdown happen faster than homeowners expect.
The catch is that those two problems can look nearly identical from the driveway. Grimy, faded, slippery pavers might just be dirty. Or the sealer might be completely spent. Or both. Knowing which situation you're actually dealing with determines whether you need a $200 cleaning, a full reseal, or a restoration that includes both services before a new coat of sealer goes down.
Rushing to seal over dirty pavers locks in the grime and ruins the finish. Pressure-washing clean pavers that still have good sealer coverage can strip that sealer needlessly. So this diagnosis step genuinely matters.
Step 1: The water-bead test (do this right now)
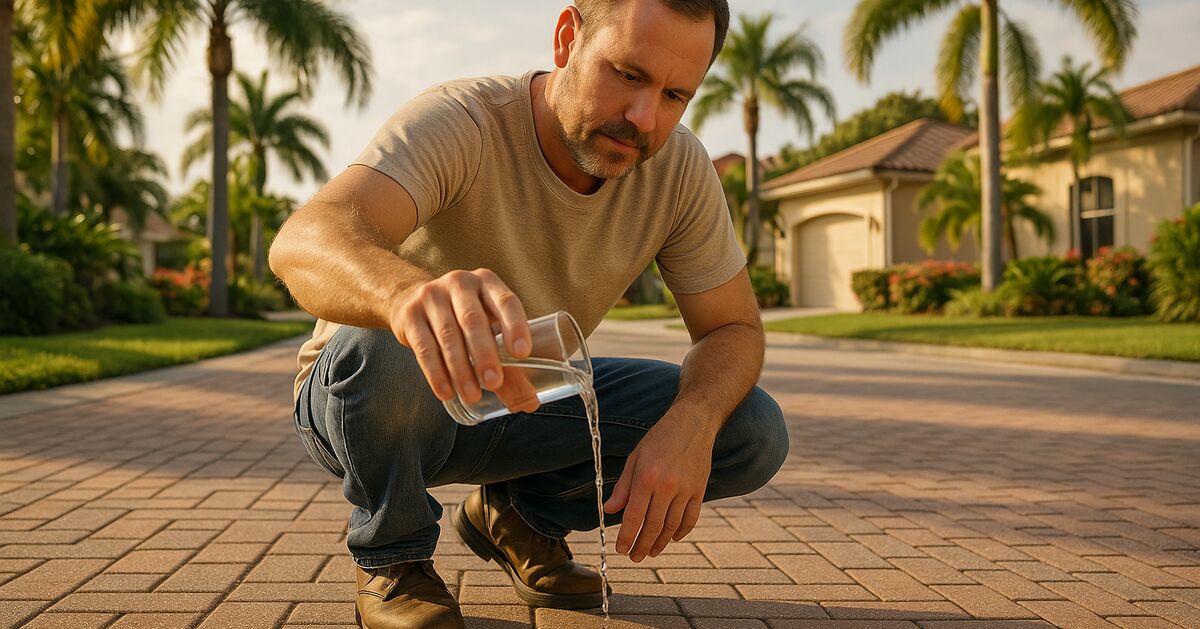
Go outside, grab a glass of water, and pour a small splash directly onto a dry section of your pavers. Then watch what happens for about 30 seconds.
If the water beads up and rolls around like water on a waxed car, your sealer is still doing its job. You probably don't need resealing at all. The pavers may just need a cleaning to remove surface algae, dirt, or atmospheric dust.
If the water soaks in slowly but darkens the paver noticeably, the sealer is thinning. It still has some life left, but you're within the window where resealing makes sense in the near future.
If the water absorbs almost instantly and the paver darkens right away without any beading at all, the sealer is effectively gone. Cleaning alone won't protect the surface. Resealing after a proper prep cleaning is the right call.
Run this test in two or three different spots, because wear patterns vary. A driveway in Lakewood Ranch, for example, might have heavy tire-track zones where the sealer wore through first, while the edges near the grass still bead perfectly. Test both areas before drawing a conclusion.
Step 2: Look at the color and surface texture
Fresh or healthy sealer typically gives pavers a consistent appearance, either a subtle sheen (wet-look) or a flat, natural tone depending on which product was used. When you're looking at a surface that's been neglected, here's how to read what you see.
Patchy, blotchy color with no sheen at all often points to sealer that has worn unevenly. High-traffic spots wear through first. This is a resealing situation, not just a cleaning one.
A uniform dingy gray or brown tone across the whole surface is more likely biological buildup: algae, mold, mildew, and dirt that have accumulated over time. This is common on pool decks and shaded driveways throughout Nokomis, Venice, and the older neighborhoods in Sarasota. A deep cleaning can transform these surfaces dramatically, and you may find the sealer underneath is still in decent shape.
A cloudy white or milky film is a separate issue entirely. That's almost always efflorescence or sealer haze rather than dirt. Our post on why pavers turn white after sealing covers efflorescence and haze in detail if that's what you're seeing.
Peeling, flaking, or bubbling on the surface is a sign of sealer failure, sometimes caused by moisture trapped under the sealer at the time of application. This requires stripping the old sealer before anything new goes down. Cleaning alone won't fix it.
Step 3: Check for slipperiness underfoot
Slippery pavers around pool decks and walkways are a safety concern that people often associate with old sealer when the real culprit is algae and biofilm growth on top of whatever sealer remains.
Get the surface wet and step on it carefully. If it feels like stepping on a bar of soap, there's almost certainly a biological film involved. A thorough cleaning with the right chemistry often solves this problem entirely, and the sealer underneath may still be functional.
If the surface feels slippery even when dry, especially on a shaded section of a Palmer Ranch or Wellen Park lanai, that's usually algae or mold that has built up to the point where it's textured enough to feel slick without moisture. Again, that's a cleaning issue first.
Step 4: Scratch and pick at the sealer gently
Find an inconspicuous spot and drag a fingernail or a coin lightly across the surface. You're not trying to damage anything, just feeling for texture.
Healthy sealer feels smooth and slightly hard. It doesn't come off on your fingernail.
If you get a white or gray powder on your fingernail, the sealer has oxidized and is beginning to chalk. This is common on driveways that get long hours of direct sun in Bradenton and Parrish, where west-facing surfaces bake all afternoon. Chalking sealer has lost its protective properties even if the water-bead test shows some minor resistance. Plan for resealing.
If you can actually pick or peel small flakes off with your fingernail, the sealer is delaminating. Cleaning alone is not the solution here.
Step 5: Think about the timeline
When were the pavers last sealed? If you don't know, the previous owner likely doesn't either. But timeline context helps a lot.
In Southwest Florida's climate, most quality sealers need to be refreshed every two to three years on driveways with regular vehicle traffic, and every three to four years on lower-traffic areas like patios and pool surrounds. Our full breakdown of how often pavers should be resealed in Southwest Florida goes into much more detail on the variables involved.
If it's been fewer than 18 months since a professional resealing, and the water-bead test still shows some resistance, you almost certainly just need a cleaning. Don't let anyone talk you into an unnecessary reseal that soon.
If it's been four or five years with no maintenance at all, assume both services are needed: cleaning first, then a fresh coat of sealer.
What a deep cleaning alone can actually do
Homeowners are frequently amazed at what a proper cleaning reveals. Pavers that looked permanently stained and faded can come back to very near their original color with the right cleaning process.
A professional deep clean typically involves pre-treating organic growth with an appropriate cleaning agent, surface washing with controlled pressure to remove dirt and biological matter without damaging the paver face or dislodging joint sand, and rinsing thoroughly. When done correctly, this process can remove years of algae, tannin staining from leaves, oil residue near garage areas, and the general gray cast that accumulates from road dust and storm runoff.
If you're curious about the specifics of what the cleaning process looks like before any sealer goes down, our post on pressure washing pavers before sealing in Florida explains the process and why it matters so much.
After a proper cleaning, run the water-bead test again once the surface is completely dry. Sometimes the existing sealer was simply hidden under so much surface contamination that the test gave a false reading when the pavers were dirty. A clean, dry surface gives you an accurate answer.
The scenario where you genuinely need both services
The most common situation we see across communities like Lakewood Ranch, Wellen Park, and Venice is this: the pavers are dirty and the sealer is also depleted. The two problems arrived together because the surface was never cleaned or maintained during the years when the sealer was slowly wearing down.
In this case, the correct sequence is always clean first, then seal. Sealing over dirty or algae-covered pavers traps the contamination under the new coating, which causes adhesion problems, uneven appearance, and early sealer failure. A proper cleaning and prep are non-negotiable before a new sealer coat goes down. This is true regardless of which type of sealer finish you prefer. If you're undecided on finish options, our comparison of wet-look versus natural paver sealers can help you think through that choice.
Our paver sealing and restoration services always include thorough surface preparation as part of the process, not as an optional add-on.
Quick summary: how to read what your pavers are telling you
Use this as a simple reference before you make any calls:
- Water beads well, surface is just dirty or discolored - deep cleaning only, check sealer again after drying
- Water absorbs slowly, sealer still present but thinning - cleaning now, plan for resealing within the next season
- Water absorbs instantly, no beading at all - cleaning followed by resealing
- Peeling, bubbling, or flaking sealer - stripping, cleaning, and resealing (restoration)
- White milky film or haze - efflorescence or haze issue, separate treatment needed
- Slippery surface - likely biological growth, cleaning is the first step
When it makes sense to call a professional for the diagnosis
The steps above give you a solid starting point, and they're genuinely reliable for most situations. But there are a few cases where it's worth having an experienced eye take a look before committing to a service:
- The pavers have never been sealed and you're not sure whether they need it
- You can see damage to the joint sand or paver edges that might need repair before sealing
- The surface has some kind of previous coating that may not be compatible with standard sealers
- Multiple areas are showing very different conditions and you're getting conflicting test results
We cover the whole Gulf Coast area from Bradenton and Parrish in the north down through Sarasota, Palmer Ranch, Nokomis, and Venice to the south, and we're happy to take a look and give you an honest assessment at no charge. You can see all the communities we serve on our locations page or reach out directly to schedule a free evaluation.
The bottom line is this: don't pay for a service you don't need, but don't skip the service you do. The water-bead test and a few minutes of careful observation can save you real money and help make sure whatever work gets done actually solves the right problem.
Get started
Request a free quote
Tell us what you need. No pressure, and a real person gets right back to you.